Mustang Mini Tub Installation
a 1987 Mustang hatchback. We will be
showing you installation of: “Extreme
Duty” frame connectors, a 12 pnt chromoly
roll cage, our “SS9” rear suspension,
coilover conversion, aluminum fuel
cell, and mini tubs along with the
frame mods needed to get the most tire
room without taking the original
frame out of the car. This will not be
a step by step as our other instructions
at this site, but as an example of how
a typical Mustang is constructed.
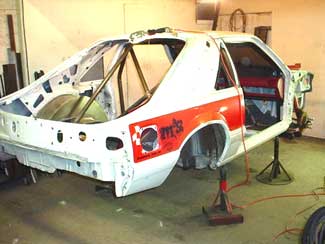
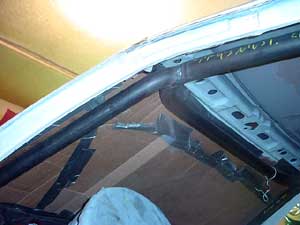
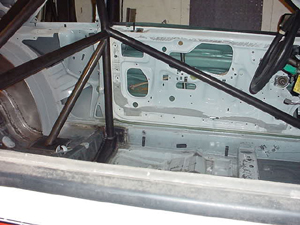
As shown, the work is in progress.
Some of the roll cage is installed
along with the frame connectors.
For more information you can go to the
roll cage installation section at this
site. The mini tubs are installed
and welded into place.
 Another shot. Notice that the plastic
panels are being finish fitted. The
panels were marked out and cut before
the tubs were installed.
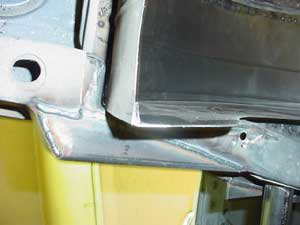
Frame connectors completely welded.
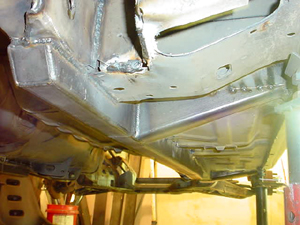
The bottom side of the
outriggers shown that support the
roll bar main hoop. The torque
boxes are now welded.
Top view of welded frame connectors
and outriggers. Shown is the main
hoop welded into place.
We usually weld all around the
torque boxes as shown.
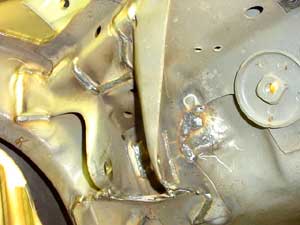
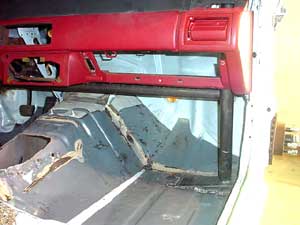
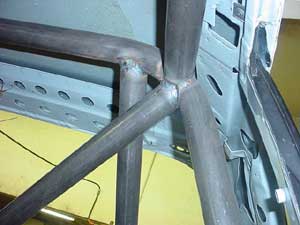
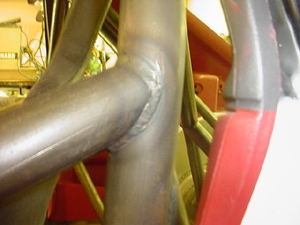
A-pillar bars and roof hoop are
added to cage work along with the
dash bar at this time.
Note clean look of the roll cage to
the a-pillar of the car.
Note front outrigger shown with
the a-pillar bar welded to it.
The professionals at AUTO WELD are
excellent at installing roll cages.
Look at the clean look of this
cage up at the roof area.
This is typical.
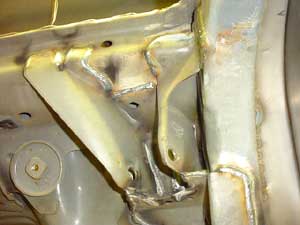
This “stub” brace is a good idea
if you have a lot of horsepower
and want to use a full dash. The
addition of these little braces
greatly increases the stiffness
of the chassis. They are welded
to the a-pillar bars, project
through the floor and curve into
the frame box as shown.
Welding a roll cage can be very difficult
using a MIG welder let alone a TIG
welder. Planning must be done before
you start to weld so that you can
complete each and every weld. This is
not the place to “goof..” up. With
“chromoly”, NHRA rules state, it must
be TIG welded!
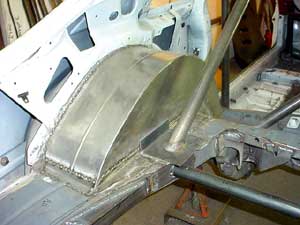
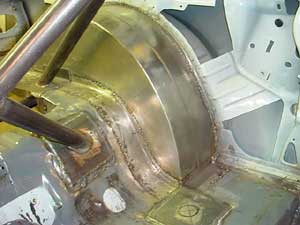
Our “Exact Shape” mini tubs are what
we say they are, “exact shape”! Look
at how nice they follow the original
shape of the outer wheel house. Since
we are going to install a fuel cell,
the back of the floor pan was cut out.
Shown is the coilover crossmember
tacked into place. Also notice that the
tubs are MIG spot welded. Do not weld solid,
the tubs will warp like crazy!
Front view of the wheel tubs.
Note that roll bar plates have
been installed. They are not only
welded all the way around, but
are actually welded directly
to the torque boxes
Looking up at the back of the tub.
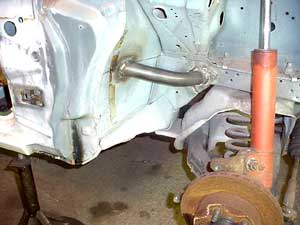
To get the maximum amount of room, you
will need to notch the frame like
we do. Make sure you reinforce the
frame similar to what is shown. You
want to keep the frame as strong as
possible.
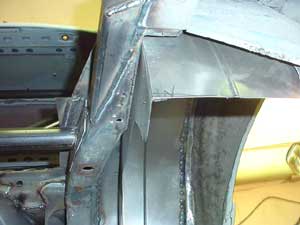
Anther view of tub and frame notch.

Inside of wheel tub
Another view with plastic panel in
place. “X” brace is welded to top
torque boxes.
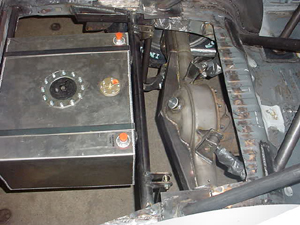
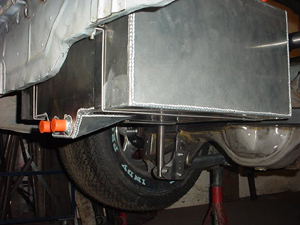
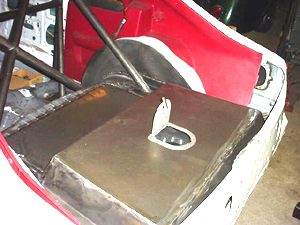
Shown here is an ideal shot of what
our famous “SS9” rear suspension
looks like in the car. Championships
have been won with this setup. We
have had a lot of magazine coverage
with this rear suspension, because
it “WORKS”! Also shown is how we
mount one of the aluminum fuel cells
sold at some of the mailorder ware-
houses. Don’t think you can put one
of these cells in your car without
a lot of modifications! First of all
you must remove the tabs that are
welded on the bottom of the cell.
Then, since the cell is so deep, you
must remove the factory trunk floor
as we did. Because the fuel cell is so
deep, it actually is taller than the
floor surface of the trunk. So our
new trunk panel had to be higher than
the factory floor. At AUTO WELD we
make custom fuel tanks for this
reason.
“TIP” Don’t expect a fuel cell bought
over the counter to fit your project
without modifications, especially
if it is a Pro-Street..er. For example,..
there are no fuel cells out there
that will give you 20 gallons with
16″ between the frame rails.
This a good shot of the bottom of
the “SS9”. Shown are the shock struts
that are just for setup puposes. They
will of course be changed for a set
of our coilovers. By the picture
you can see that our rears are
built super strong.
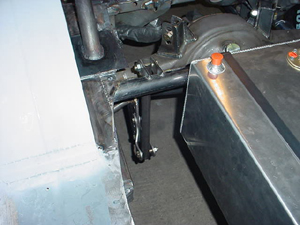
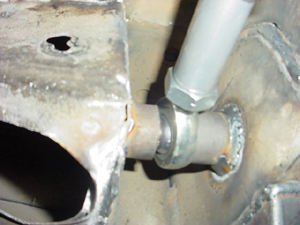
Close-up of coilover mount. Exhaust
will be run on this car. It will fit
but be tight.
Fuel cell mounts are attached to shock
crossmember and a 1×1 steel tube that is welded
between the frame rails. Strapping
and mounts are then added.
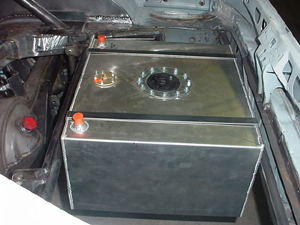
Bottom side of the fuel cell.
Remember, don’t get the cell
too low in the car. You don’t
want to drag it on the ground
when doing a wheel stand!
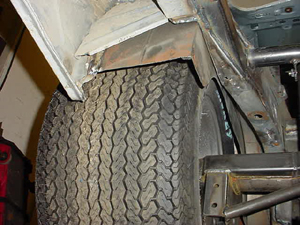
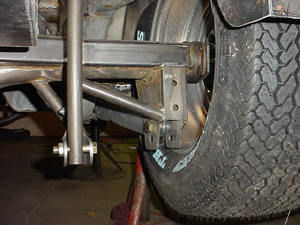
BIG meats are over 13″ wide and are
under the fender lip.
Rear perspective.
Another thing nice about our SS9 is that
the spacer bushings that come with
the kit are easily welded to the
lower torque boxes. This greatly
enhances the strength and durability
of the bolt holes. They won’t “egg” out.
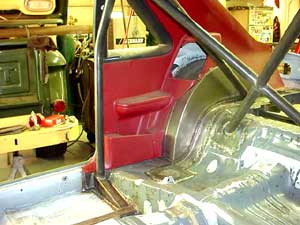
Roll cage is finished. Side bars are
added at this point on a job like this.
Unless you like crawling over the side
bars a hundred times, install last.
If TIG welding make it nice! Watch
the heat!!
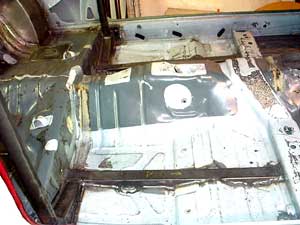
New floor cover welded into place.
Racing sanctions require you to have
protection against fire in case of a
crash. Fuel cell is isolated from
passenger area. A dragster style
fuel access was installed. You can see
the fuel cell cap under the opening.
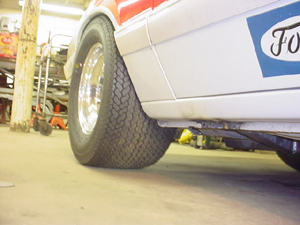
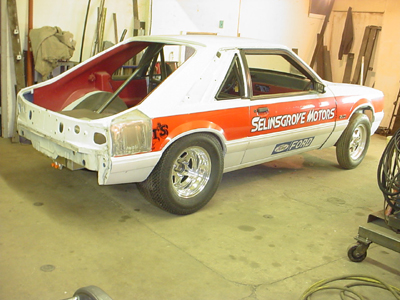
Tires nicely tucked under.Looks
great! Best of all it is going
to work!!
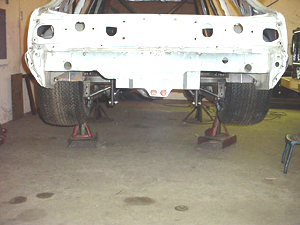
Done! At least for us. Ready to go
home for completion. Note gas fill
hole has been closed.
Note: For you guys that may have
been with the Mustang craze for the
last 15 years or so, might recognize
this car. Tom D. “owner” got some magazine
ink with this car as it was one of
the first Mustangs to run low…12s
back in the 80s. Might not sound like
much now, but this was a big deal
back then, because of the car being
completely stock!
He just wants to go faster now,…kind of
like the rest of us!!
We hope this page is of some help to
those who would like to mini-tub
their Mustang. If you need assistance,
give us a call.