

Project Fairlane
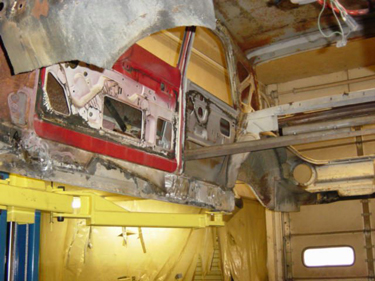
The following is an example of how we install our AUTO WELD chassis. To start, record the measurments needed to locate the chassis in the right relationship to the body at the axle centerlines. This will be done BEFORE any cutting starts. Take the appropriate steps to secure the body before cutting starts. Then start removing the factory floor where needed. *** For our installation we use a combination of a LIFT and a portable chassis jig. *** NOTE: You don’t have to remove the whole floor pan as shown. The chassis CAN be grafted into the stock floor as shown in our other online instructions.
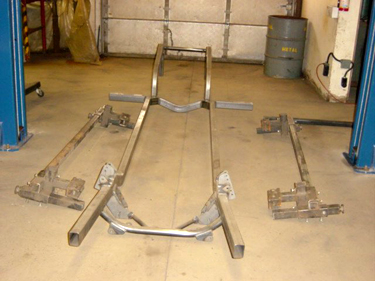
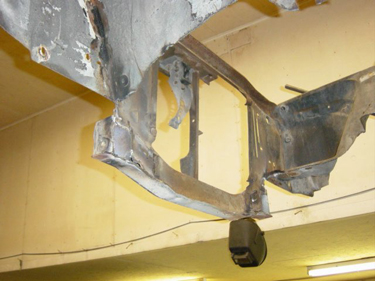
An AUTO WELD fixture welded frame shown above. Includes: the Featherweight front and 4-Link rear frame.
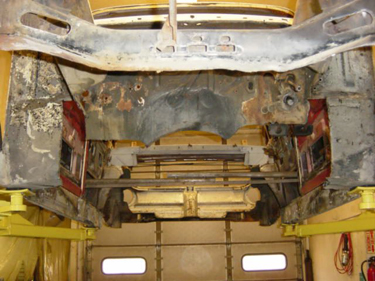
You will see in the next few pictures, in this particular job, that we removed almost the entire floor of the car. Most of the firewall is retained at this time, as with most of the splash pans in the front. This will help hold the body in shape. *** NOTE: You only want to remove what is necessary. After the frame is welded into place the rest can be cleaned and modified later.
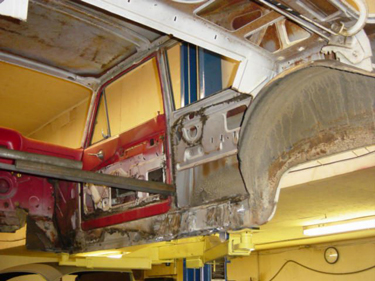
You will notice above that we have placed braces in key areas to keep the body from moving out of position…between the right and left sides near the door jams and up front to keep the droop to a minimum. This makes for less headaches later.
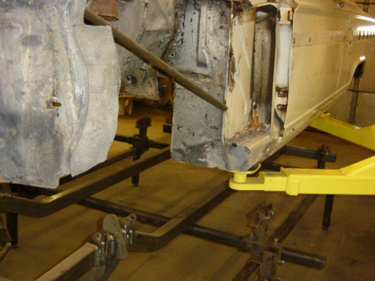
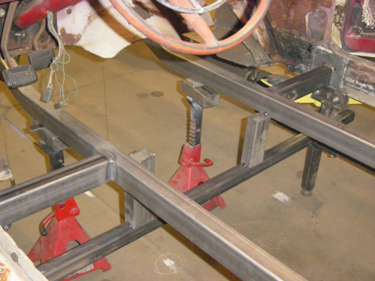
At this time we are transferring the body from the lift to the chassis jig. We are now leveling the body after having clamped the body to the chassis jig. Notice that the new AUTO WELD frame is sitting on the jig ready to be positioned to the body.

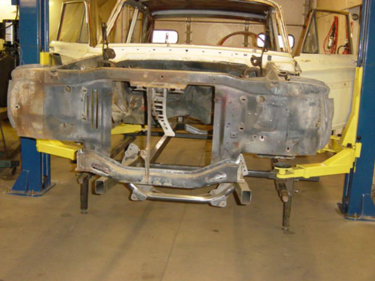
At this time, transfer the center of the car to the floor using plumb bobs. From there, using the lower front suspension bolt holes, drop plumb bobs down and mark the floor and center the frame. *** The same will be done in the back using the lower 4-link bolt holes to center up the rear of the frame. *** Note: When you are locating the frame on center..make sure that the axle centerlines are in position (fore and aft). *** This is the critical time in which all the measurements that you took before you started will come into play. In conclusion..what you are trying to achieve is …keeping the axle centerlines on mark and the frame itself centered in the body!
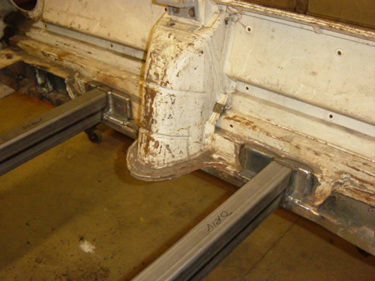
This is how we attach the frame to the body using outriggers. In the front they are placed where the A-pillar bars of the roll cage will be mounted.
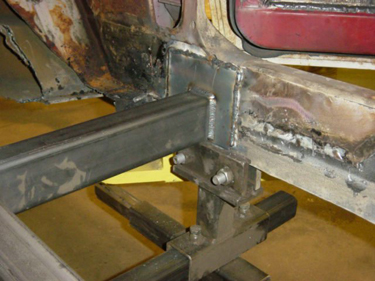
When attaching an outrigger to a rocker panel, a 1/8″ plate should be used to strengthen the area
The front frame is welded to core support. Here is shown how we mount the AUTO WELD frame in front. In many cases, because the front rails are flared, they hit the core support in the right place.
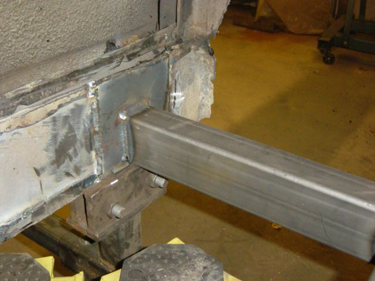
Shown..is the dropped crossmember (outrigger) with the 1/8″ plate welded into place. Another outrigger will be welded into place for the main hoop of the roll cage to sit on farther forward. Note: On some cars..this is not required.
In the back..notice that the rails have 1/8″ plates welded for strength.
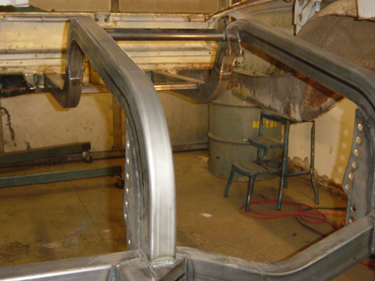
Another view of the rear of the frame welded into place.

Although we can offer a chassis with a one piece rear frame rail, it is much easier to install a rear frame..especially a full length frame, with the back rails stubs being separate. Remember…you are going to be fitting the frame inside of the existing body shell. It makes it so much easier to put the rear stubs on last for a mistake free job!
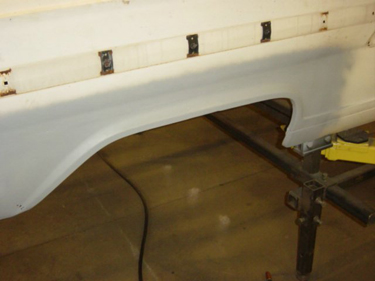
Now it is time to open the rear wheel opening. In order to start, you have to know where the tire is going to be located. We have already lined up the rear housing to do this as shown.
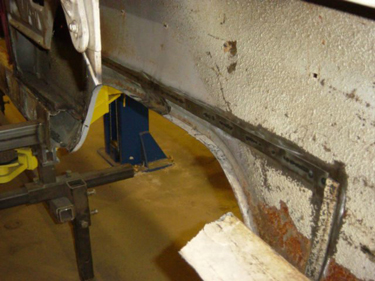
After the rear is lined up, carefully remove the outer opening as shown.
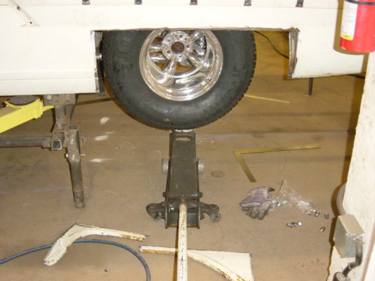
Mounting the tire will help in determining the proper clearance and look.
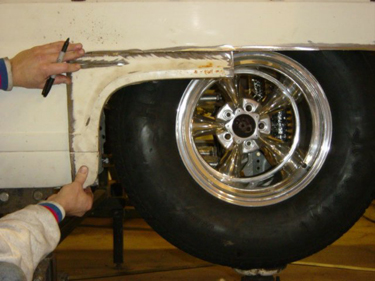
To plan out your next step, hold the removed portions of the fender up and mark out where to cut. In the front…
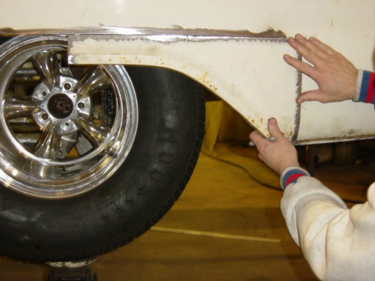
…and in the rear of the fender opening.
When reinstalling the fender opening parts, a filler must be fabricated to weld in between the two halves. We always use a backer strip behind where the welding is being done. This is what it looks like from behind. Warning: don’t get the quarter too hot when welding. A rule of thumb is… you should be able to lay your hand on it after welding. If it is too hot..you may warp the sheet metal. Care must be taken here!
This is how it should look! Nice and straight..not warped! A minimum of body filler is needed.

SICK!!!!
A look from inside.
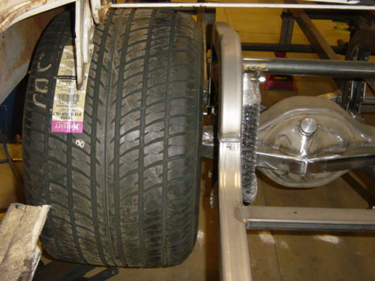
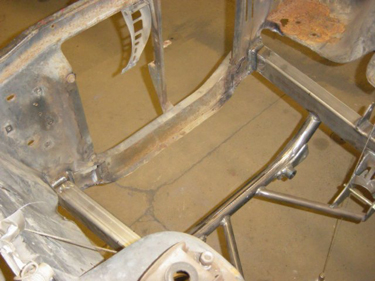
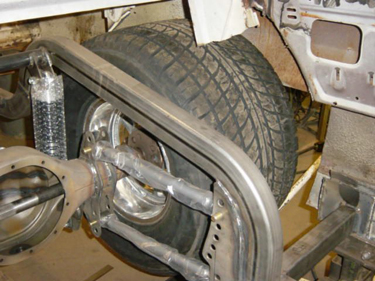
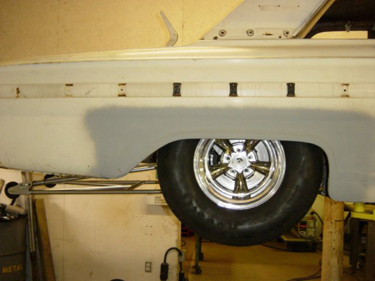
Check out the clearances! Remember you have to get the tire off as well.
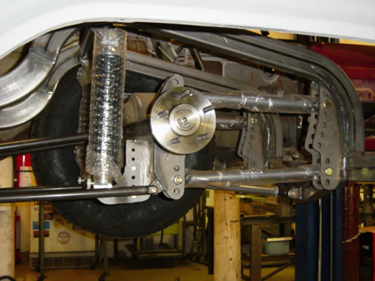
Another angle of the 4-link in place. Note the plastic covering around the 4-link and coilovers. Don’t want to scratch them now.
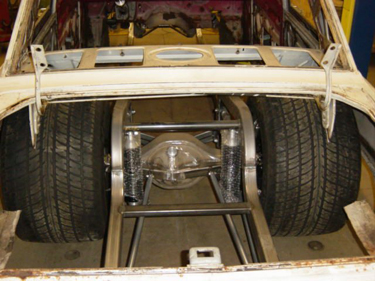
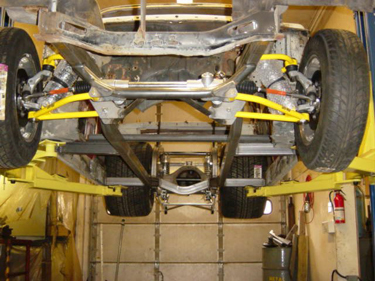
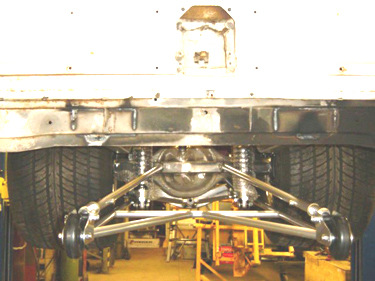
BIG MEATS… Shown here is what the entire suspension looks like before any sheet metal is added.
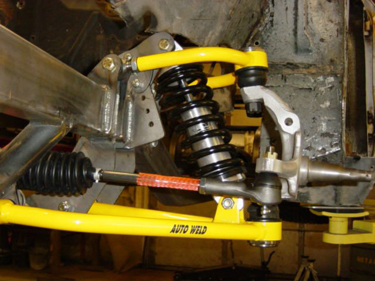
AUTO WELD’s trick front suspension..shown with a unique coilover mount to change ride height.
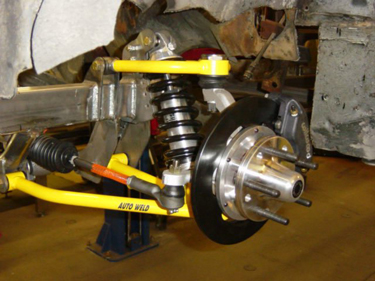
Elegant and functional! Notice the wrap-around bracketry for strength and being welded to 11ga material ..not the chintzy .083wall stuff other companies use.
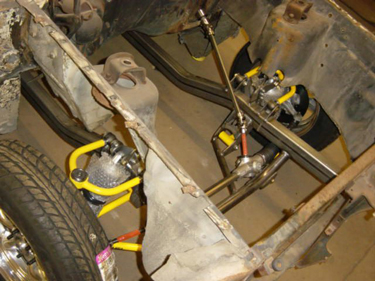
As you can see there is going to be more motor room when finished and additional pan clearance. Also…you can use a big radiator with the way the front of the frame is flared.

Bottom shot… As you can see the work is very straight forward and very clean looking when done..SHOW CAR QUALITY!!
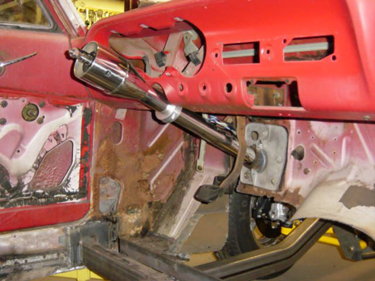
A nice shiny steering column is a good addition to any project.
COOL!!!
VERY COOL!!!
In summary..as you can see, it isn’t difficult for the do-it-yourselfer to install an AUTO WELD “roller type” chassis. To finish this project a cage and sheet metal work still need to be done. And of course other things are needed to be done as well. Using this kind of a platform in which to start is a great way to create your perfect ride, for a race car or a pro-tour/streeter. *** NOTE: AUTO WELD builds chassis for most cars and trucks, or by your drawings.